
How to Sight In Your Rifle Scope Quickly and Accurately (Tips for Thermal and Traditional Optics)
Sighting in a rifle scope is one of the most important steps to ensure your shots hit exactly where you aim. Whether you’re running a traditional daylight scope or a modern thermal optic, a proper zero turns a rifle into a reliable tool for hunting, competition, or tactical work. The process aligns the reticle with the bullet’s actual point of impact at a chosen distance—usually 100 yards for most hunters and shooters. While the basic goal remains the same for both optic types, the tools, targets, and adjustment methods differ significantly. This guide walks you through proven, straightforward techniques to get either system dialed in quickly, accurately, and with minimal wasted ammunition.
Aligning Your Rifle Scope for Precision Shooting
What Does It Mean to Sight In a Rifle Scope?
Sighting in your rifle scope means the vital task of matching your optic’s aiming point with the real spot where your bullet hits. When you tweak for windage and elevation, you make sure that the reticle’s position matches the bullet’s landing spot at a set distance. If you are a hunter aiming for clean one-shot kills or a tactical shooter needing exact hits, correct zeroing builds the base for steady accuracy.
For common optics with glass lenses that magnify, sighting in often uses manual turrets and direct sight lines. Yet, thermal imaging scopes depend on electronic sensors to spot heat patterns, so they call for special setup steps. The main aim stays the same: line up your reticle with the bullet’s impact point — though the approach varies by the optic’s design.
Key Differences Between Traditional and Thermal Optics
Standard scopes use visible light and zoom to let you spot and hit targets in bright conditions. They give sharp images, good contrast, and hands-on tweaks via turrets. Thermal scopes work by picking up infrared heat from items. This setup suits nighttime work or times of thick fog and thick plants when sight is poor.
Because thermal tools do not rely on light, they need custom targets for zeroing. Also, thermal imaging scopes such as the FX50L include electronic zeroing features and bullet path calculations that make the setup easier.
Preparing for a Successful Scope Zeroing Session
Choosing the Right Environment for Sighting In
The first move to get a solid zero is picking a good spot. A calm shooting area with little wind is best. For basic zeroing of both standard and thermal optics, start at 25 yards. When your shots group close to the middle often, shift to 100 yards to polish your aim.
Make sure your background is safe, with a straight shot path and proper target stands. Steady weather cuts down on outside issues that might confuse your tweaks during setup.
Essential Tools and Equipment Checklist
To run a good sight-in session, gather these items:
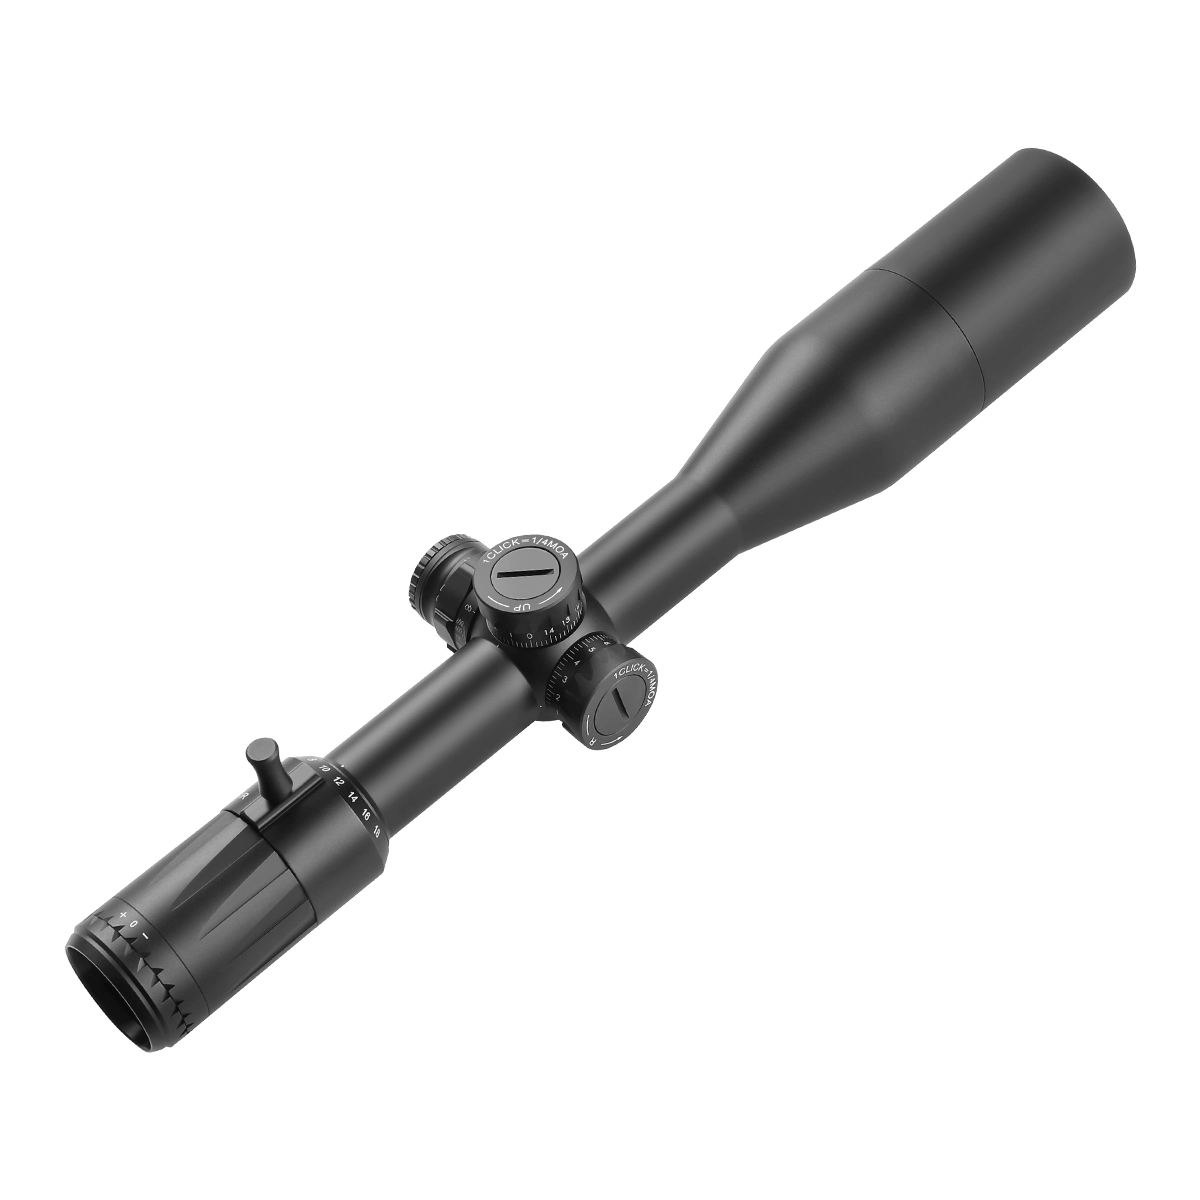
Your rifle with a firmly attached scope — like the VX3-18X50SFIR, great for far-off shots in daylight.
A firm shooting base: bipods, sandbags, or a bench rest fit well.
Bore sighter to roughly line up your optic before shooting live rounds.
Target paper marked with grids.
Spotting scope or binoculars to view your hits without going to the target.
For thermal scopes, warm targets or heat-holding stuff like foil on hot water bottles to make clear heat signs.
How to Sight In a Traditional Rifle Scope Like VX3-18X50SFIR
Features That Aid Quick and Accurate Zeroing
Standard scopes such as the VX3-18X50SFIR are made for clear views and solid mechanical work. This model has lenses coated many times for better light flow and sharp sight in dim light. Its 18x zoom helps grab targets at long ranges, while a side-focus tool keeps the picture clear at different distances.
With clicks of ¼ MOA and a body from strong aluminum like in planes, this optic gives clear feel and lasts through rough use in the field.
Step-by-Step Process for Zeroing Traditional Optics
Initial Bore Sighting Setup
Start by taking out the bolt (if your rifle is bolt-action) and lining the barrel center with your target at 25 yards. Then peer through the scope and turn the windage (side to side) and elevation (up and down) knobs until the reticle sits right over the spot you want to hit.
Live Fire Calibration at 25 and 100 Yards
Shoot a group of three rounds at your target. If the hits miss the center, use your scope’s knobs to move them closer. Each turn on most scopes means ¼ MOA — about ¼ inch at 100 yards. Tweak bit by bit after each group until your bullets land in the bullseye every time.
After you get it set at 25 yards, do the same at 100 yards to make it even better.
Confirming Consistency Across Distances
Stretch your check to 200 yards or farther if you shoot at long ranges. A steady hit spot over distances shows your optic is set right. Tweak a little if needed to fix for bullet drop.
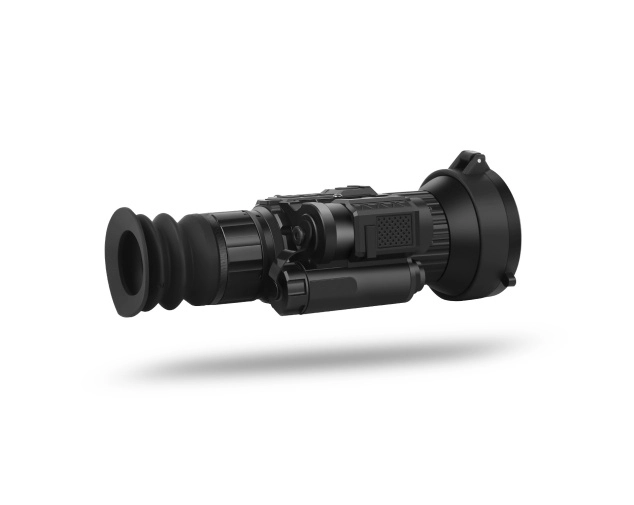
How to Sight In a Thermal Scope Like FX50L Efficiently
Unique Features of the FX50L That Enhance Zeroing Speed and Accuracy
The FX50L marks a big step in useful thermal imaging, mixing pro-level work with easy carrying. It has a sensitive 640×512 sensor chip and a system that starts recording on recoil, so it holds up in tough spots and strong weapon kicks.
It also has tech that fits bullet paths and adjusts for weather factors on its own. The easy controls and bright OLED screen make reticle shifts simple without extra gear or deep know-how.
Best Practices for Zeroing a Thermal Scope in Daylight or Darkness
Target Selection and Setup for Thermal Calibration
In bright day or full dark, thermal scopes rely on heat differences to find targets. Pick aluminum foil on warm water bottles or store-bought hot targets. Set them at your planned zero distance and check they show up well in your scope’s heat view.
Adjusting Reticle Alignment Using On-Screen Interface
Use the digital zoom to make the target bigger. Shoot a group and go to your scope’s menu to move the reticle until it lines with the hit center. Many top scopes let you save several zero setups for varied rifles or bullet types.
Verifying Zero in Real Hunting Conditions
After range or indoor setup, try your thermal scope in a true setting — like dim woods or areas full of plants. This checks how the optic works in places you will use it for real.
Comparing Traditional vs. Thermal Optics During Sighting In
Pros and Considerations of Each Optic Type During Calibration
Standard scopes bring top-notch clear sight in daylight and are simpler to set using paper targets. Their hands-on strength draws shooters who like direct control.
Thermal optics give better target spotting in poor sight but need special targets and electronic setup steps. They might look harder at first, but their built-in software makes zeroing quicker after you learn it.
When to Choose One Over the Other Based on Shooting Goals
If your main work is daytime hunting or contests, standard optics offer ease and exactness. If you work in night or thick land where seeing is hard, thermal imaging is key — above all when linked with bullet path math.
Tips to Maintain Zero Over Time with Your Scope
Environmental Factors That Can Affect Your Rifle’s Zero
Changes in heat can make metal parts grow or shrink a bit, moving your zero. Bumpy rides or falls might also bump your scope out of place. Always check zero again after trips or weather shifts.
Routine Maintenance Practices
From time to time, make sure all screws, mainly on mount rings and bases, are tight with a torque tool at the maker’s levels. Wipe lenses with soft items and keep optics in soft cases to avoid jolts on the go.
Leveraging YUBEEN’s Product Advantages for Better Shooting Performance
Picking a strong optic can boost your hit rate a lot. If you want clear views and toughness in standard scopes, look at the VX3-18X50SFIR. It has coatings that cut glare on all glass-air spots and a tough build that tests to 1500G shocks.
For skilled thermal users who value easy carry and built-in help, the FX50L stands out. Its simple shape sticks to key proven parts for battle, skipping extra fuss while giving sure work when you need it.
You can find both types right from Yubeen, a firm that supplies thermal imaging tech trusted by hunters, police, and army folks around the world. Yubeen works hard to bring forward thermal imaging tech for army, police, hunting, and more areas.
Support Services from YUBEEN You Can Rely On
Expert Guidance on Product Selection and Usage
Yubeen gives tech help before and after you buy. If you need tips on picking optical or thermal options or setup pointers, their skilled team is there by email or phone line.
Warranty Coverage and Customer Care Options
The whole machine is guaranteed for two years, which means you get full guard against factory flaws — not just fixes but swaps when required.
How to Contact YUBEEN for Assistance or Purchase Inquiries
You can get their service team by email, WhatsApp, or the site’s contact page for item tips or seller chances.
FAQ
Q: How often should I re-zero my scope?
A: Re-zero after any big weather shift (like heat or dampness) or bump from moving it. At least, check zero every few months if you use it a lot.
Q: Can I use standard paper targets for thermal scope zeroing?
A: No. You’ll need heat-making targets such as warm water bottles with foil covers or shop hot pads to make heat signs that show in thermal views.
Q: Do I need different zero settings if I switch ammunition types?
A: Yes. Bullets that differ have unique paths; set it up again when you change types. Many smart scopes allow stored profiles for this.